 |
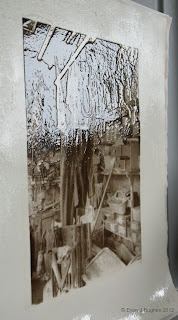
| Wet carbon showing relief image |
Carbon Transfer Printing Using Soot:
A Rough Guide for the Mad
NOTE: The European REACH regulations now mean that for us Europeans, this page is a historical footnote as to how the process was once done, as the chemicals necessary are no longer available. Sorry Folks!
Introduction
The carbon transfer printing process has a long and tortuous history, from Poitevin in 1855, and later a practical form patented by Joseph Swan (of lightbulb fame) in 1863. Carbon transfers are still about the most archival printing method known to this day.
The process starts by mixing soot and gelatine and pouring out into a black sheet called 'tissue'. This tissue is poured onto a carrier paper so that it is easy to handle. Once dry, the gelatine tissue is made light sensitive by applying potassium dichromate and then squashed together with the image negative and exposed to ultraviolet light.
The now 'cooked' tissue is soaked in water and then squeegeed onto a piece of water colour paper (which has been previously coated with a mix of gelatine and formaldehyde) and left to rest for a while. As the sandwich rests, the water moves between the wet paper and carbon tissue and (hopefully) sticks the two together.
The fun bit comes next. The sandwich of papers is then placed in a bath of hot water, whereupon the soot-laden gelatine starts to melt; it is interesting watching the gelatine ooze out of the sandwich
After a few minutes, whilst holding ones breath, the carrier paper is stripped from the sandwich, hopefully leaving the now dissolving carbon tissue stuck firmly to the watercolour paper; this is often where the first volley of expletives get propelled across the kitchen as chunks of the image stick to the carrier sheet and not the other paper.
The image is currently a black mass of dissolving goo. The paper is then floated face down in the hot water for about 15 minutes and hopefully all the gelatine that was under the dense parts of the negative and did not harden with the UV light detach and sink to the bottom of the tray. The next round of expletives is if the image also detaches and sinks!
A dark version of the final image should now be visible. With longer soaking, more and more of the gelatine falls away until the final image is left, ready for drying.
The wet carbon print has a very interesting characteristic; the more UV light hit the gelatine when being exposed, the thicker the layer (and so the more soot) that is left. The result is that a strong relief image is visible in the wet print (as in the image above). Some carbon printers strive to get as thick a relief as possible so that even when the image is dry, there is still some textured relief visible.
With the watercolour paper I use, there is little or no relief left when it is dry; apart from the odd lump of course ground soot that is.
The detailed process is summarised in the sections below; hopefully I have made them 'simple' enough to follow, however each stage requires many attempts and practice before you can make a decent print. You must be mad if you want to try this!
Stage 1. Preparing the pigment
The first part of carbon transfer is to first find a source of pigment. Many folks are sensible enough to squeeze some ready-prepared pigment from a watercolour paint tube; it is very finely ground and intimately mixed with a little gum Arabic as a carrier. The result is that it mixes easily into the gelatine mix and makes fine prints. By mixing various paints, a whole spectrum of colours can be achieved and even multi-layer colour prints can be made.
I found using watercolour paint way to easy!
My preferred approach is to first sweep the chimney. I collect a few handfuls of soot in a bag as my raw pigment. The advantages of soot are few, but important:
- It is recycling a waste product (i.e. it is free)
- Soot is made from particles of carbon and therefore will not fade and really is the ultimate in permanence for printing with; unlike some of the water colour pigments which could fade.
- I can control the particle size in the pigment to add extra texture and character to the prints.
- Carbon transfers made with pukka soot are rare these days, although I doubt it will help me sell any!
There are a few downsides though:
- It smells of soot
- The soot has tars and other contaminants; many of them are yellow in colour and absorb UV light and stain the paper. The oily compounds can make mixing with the gelatine a right royal pain.
- The tiny particles of carbon are all clumped together into big chunks so it needs grinding.
On balance, I decided to persevere with the soot approach and at last seemed to have tamed it (sufficiently tame anyway).
I have tried many approaches to preparing the soot, but have settled on the following approaches.
Method 1: Basic
For very course soot prints with lots of 'character', I just pummel the soot in a pestle and mortar. I then pass the soot though a fine sieve (old tea strainer) to refine the particle size a little. The soot is a dry powder at this point and the slightest breeze can send it airborne; a dust mask is essential.
After grinding , I add a single drop of gum Arabic and pound that into the powder in the pestle. I then add a drop at a time until I have a thick paste with all the powder coated. I then add water a drop at a time and mix well to try to thin the paste a little. The paste may now be weighted out and added to the gelatine.
In practice, if you add the paste to the glop, there is no way it will mix in properly. The best approach is to add a little of the hot gelatine and sugar mix to the paste and mix well. The gelatine mix is added slowly, thinning down the paste all the time until it is runny enough to mix well with the main batch of hot gelatine.
It takes about 15 minutes to go from raw soot to the pigment mixed into the gelatine with this approach.
Method 2: More refined
My current approach takes a little longer; about 6 months longer!
I start by 1/4 filling a 2 litre coke bottle with raw soot, then I add hot water to fill the bottle, give it a shake and then let it settle for a fortnight.
At the end of the fortnight, I pour off the liquid (the top 2/3, the soot is all at the bottom) and re-fill the bottle. The liquid from the first pour is so dark that you need to shine a torch through the bottle to see that the soot has settled; it also stinks of soot.
I repeat the process about 10+ times.........
If 2/3 of the water is changed each time, with 1/3 left, after 10 washes, the crud of tars and oils in the soot have been diluted to about 1/50000 of the original concentration. The water is still pretty yellow though and soot smell is quite feint, but still there.
The soot is now much finer than before; much of the crud that was washed away was what held the soot into clumps. I load the soot into the jar of my ball-mill, add marbles and then let the ball-mill run for a few days (or until it burns out yet another motor).
The resulting liquid sludge is then diluted with water and passed through the tea-strainer but with a layer of old tights too; only the very fine particles can pass. For a very fine pigment, two layers of nylons can be used. The filtered black liquid is then put in a metal pan and boiled on the stove until it is just a thick paste with very little water. Even though the smell of soot had almost gone, when boiling off the water, it still makes the house stink :(
The final stage is to put the goo in a jar. Even though the soot has been washed and boiled, it is very prone to growing green fur. I have tried adding Listerene, but it still grows. A single drop of formalin seems to do the job and also does not seem to be enough to cause problems with premature hardening of the gelatine when it is made into tissue.
Stage 2. Making The Glop
The 'glop' recipe is a critical element of the process and although all printers have their own, the pigments used seem to have a significant bearing on the success of each blend. I have found my methods work well with soot but do not necessarily work with other pigments.
The glop consists of
Gelatine about 80 to 100 grammes
Sugar about 80% of the gelatine weight
Soap (not detergent) about 10% of the gelatine weight
Soot about 35% of the gelatine weight (but...)
1 litre of water.
The first tricky bit is that each batch of soot will be different; the colour and properties change depending on how high up the chimney it was swept from and also how finely it is ground. So more or less pigment will be needed. I tend to make a trial 100ml batch which gives me 2 8"x10" tissues to test and then adjust the pigment quantity from there.
The second issue is how much gelatine to use. If it is going to be hot when I am pouring tissue, I use more gelatine so that it sets up faster, however it does alter the properties of the tissue and can make it more curly and the backing paper more difficult to strip off. If it is winter and cold in the kitchen, I can use less gelatine.
I start by adding the gelatine to the (cold) water and letting it stand for a half hour or so to let it swell up and absorb as much water as possible. In the mean time, I grind together the sugar and soap with a pestle and mortar. The sugar and soap are then stirred into the cold gelatine and the jug popped either into a bain-marie, or into the microwave (use many small blasts). As the gelatine melts, the mass is stirred. Slowly the sugar and soap dissolve into the mix, however there is often a fair degree of scum/foam on the top if a microwave is used. I scoop off the worst of the foam and bin it.
| Gelatine, sugar and soap melting |
Once the gelatine is at about 40 degrees centigrade and the sugar and soap dissolved, I add a little of the gelatine mix to the soot paste. I mix the two until the paste is again uniform and now a touch more runny. I keep adding gelatine a little at a time and mixing in.. When the soot is really quite liquid, I add it to the rest of the gelatine.
| Hot glop after soot added |
I now filter the solution through the tea-strainer and one layer of nylon tights to get out any remaining lumps of gelatine, soap or soot. Interestingly, the glop is like black silk and bubble free, just minutes after melting it.
| Remnants of pigment in filter |
Stage 3. Pouring the tissue
I make support papers for the tissue by cutting sheets from a roll of lining paper intended for use on walls. I mark out an 8"x10" region in the centre of each sheet as my pouring guide (or bigger region if I am doing larger prints). I prepare the tissue support papers by soaking them in hot water until the bubbles stop, and then dunking them in a cold bath to chill them. I then squeegee them onto a board ready for pouring the glop.
 |
| Marking out tissue support papers |
I level the board with the sheet on and then I pour 50ml of glop for each 8"x10" area and spread it around using an old comb. The glop is left for a few minutes to gel, then transferred into the garage where it is cooler and the glop can gel significantly. When the glop is well set, the paper is peeled from the board and hung up for a day or two to dry out.
 |
| Wet tissue support paper squeegeed to board |
 |
| Pouring glop on paper; pour slowly to let glop cool and slow the spreading |
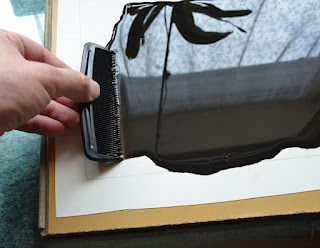 |
| spreading glop with an *old* comb |
 |
| poured tissue gelling (and attracting dust) |
 |
| set tissues hanging to dry |
Stage 4. Sizing the final support paper
Unfortunately, the carbon tissue is fussy about what surface it will transfer to and actually stick. Good quality watercolour paper is one surface that the tissue will definitely not stick too properly unless given a little help. The approach is to add extra surface sizing to the paper.
The most reliable surface sizing I have tried is gelatine that has been hardened. Quite a thick coat of gelatine is needed to produce reliable transfers, but with water colour paper, even a heavy coating is not really noticeable as it sinks into the paper. If a really heavy sizing is applied so that the paper surface is shiny, when the carbon print is transferred and dry, the relief image of the raised gelatine may well be visible.
I coat the front surface of the paper twice with the following solution:
Gelatine 6g
Water 100ml
Formalin 1ml
I let the gelatine swell in the cold water to start with and after about half an hour, give it a blast in the microwave to get it to about 45 degrees centigrade and all melted. I then apply gloves, apron, goggles and stir in the Formalin and retreat outside, with the wind behind me and a vapour respirator on, to brush the solution onto the paper. The mixture does not have a strong odour (I find that Formalin smells slightly 'sweet'), but would very quickly make your eyes sting if the wind changes direction (good fitting goggles are a must of course). Formalin is nasty stuff but does a fantastic job at hardening the gelatine (and any other tissues it comes in contact with).
After coating, I leave the paper to dry and the smell to subside for a day, then repeat the process with a second coat. 100ml of the solution is enough to generously coat 2 full sheets of paper (22"x30" sheets). After the second coat, the paper should be left hung for a few days to allow the last of the Formaldehyde to out-gas, then the sheets can be cut into the required smaller sizes. If I am short of paper and the sheets have only hung for a day, I will soak them in water to help remove the last traces of Formaldehyde and then dry them before use.
It is critical not to store hardened paper anywhere near sheets of carbon tissue as the last remnants of Formaldehyde gassing out of the sized paper can prematurely harden the tissue.
Stage 5. Sensitising and exposing the tissue
First the negative is prepared; the negative should have a black border around it (either printed or by adding light-proof tape to the edge) so that the tissue at the edge will be unexposed and will wash away. The 'safe edge' helps prevent the gelatine detaching at the edges and also allows a safe buffer region for any uneven sensitisation at the edges of the tissue.
Using a damp foam brush, the sensitiser is brushed into the tissue; I pour half of the quantity into the centre of the tissue and brush it in, then when all is absorbed, brush in the remaining sensitiser. It is important to keep the tissue evenly covered so that it gets an even coating. When all the sensitiser solution is absorbed, the tissue is left for an hour or so to dry in the dark.
All of the remaining operations are done under dim incandescent light; the tissue is sensitive to daylight and fluorescent lighting and if exposed, the image will be fogged. I often have to help the tissue to be fully dry at the end of drying with a hair dryer (an old one and a respirator face mask!).
Once fully dry, the tissue can be mated to the negative and exposed to ultra-violet light. There is quite a bit of trial and error up front to work out the strength of the sensitiser and the exposure time needed so often the first few prints are no good :( It is a good idea to place a thin piece of acetate between the negative and the tissue as if the tissue is not fully dry, it will stick to the negative and trash it.
As the tissue is exposed to UV light, the dichromate in the tissue hardens the gelatine in proportion to the exposure. The soot in the tissue acts to block the light and so it is only the very top layer of the tissue that contains the image. If the tissue was developed in hot water as-is, the gelatine in contact with the paper would dissolve and the image would float off :( Thus the need for the next step of transferring the image.
 |
| Tissue being trimmed to size |
A piece of tissue is then cut to be slightly smaller than the safe-edge region of the negative. The amount of sensitiser can now be calculated; I use 10ml total for an 8"x10" area. The sensitiser is a 1:1 mix of Potassium Dichromate solution and acetone.
Wearing gloves and goggles, the sensitiser solution is measured out and mixed.
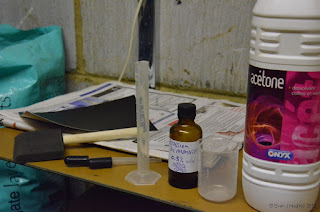 |
| preparations for mixing sensitiser |
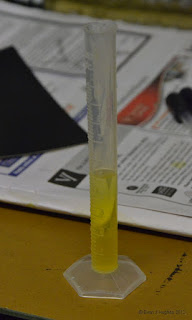 |
| sensitiser ready for application. |
All of the remaining operations are done under dim incandescent light; the tissue is sensitive to daylight and fluorescent lighting and if exposed, the image will be fogged. I often have to help the tissue to be fully dry at the end of drying with a hair dryer (an old one and a respirator face mask!).
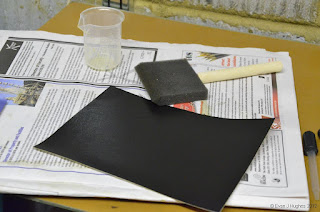 |
| Sensitised tissue ready to be dried in the dark. |
Once fully dry, the tissue can be mated to the negative and exposed to ultra-violet light. There is quite a bit of trial and error up front to work out the strength of the sensitiser and the exposure time needed so often the first few prints are no good :( It is a good idea to place a thin piece of acetate between the negative and the tissue as if the tissue is not fully dry, it will stick to the negative and trash it.
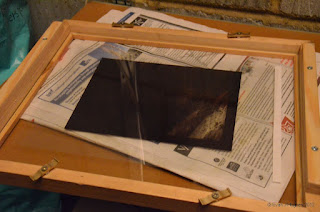 |
| Negative against the glass of the contact frame |
 |
| Tissue and negative in contact; note the tissue is within the safe-area |
 |
| Exposing with UV light |
Stage 6. Transferring to the support paper
Once the tissue has been exposed, it must be mated with the final support paper. The tissue has no image visible on it yet so you have to trust that the timings under the UV lamp were right! First the tissue is removed from the printing frame (under dim light only) and placed along with the final support paper into a tray of cold water. The water has been left to stand in a bottle for many days in order for any dissolved air to escape; water straight from the tap can lead to tiny bubbles in development.
The tissue is soaked for 1 minute and then turned over and slid back into the water ready to mate with the support tissue. It is important not to introduce any bubbles between the papers here and a good layer of water between them is really helpful.. The sandwich is now lifted from the water and placed on a board (or piece of glass) for mating. Note that there is a letter 'T' on the tissue backing paper which indicates which side was the top of the image.
The sandwich is now squeegeed onto the board; I use a roller as it allows me to control the alignment of the tissue better. The roller is used to expel water and any trapped air from between the tissue and the support paper. I roll from the centre outwards to push any air out towards the edges.
The board and sandwich can now be drained and blotted off and allowed to stand (in the dark or with another board on top) so that the water trapped in the tissue can migrate into the final support paper, sticking the exposed side of the carbon tissue (and therefore the image) onto the final support.
 |
| Final support and tissue soaking in degassed water |
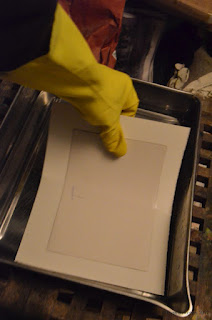 |
| Lifting the paper and tissue from the water |
The sandwich is now squeegeed onto the board; I use a roller as it allows me to control the alignment of the tissue better. The roller is used to expel water and any trapped air from between the tissue and the support paper. I roll from the centre outwards to push any air out towards the edges.
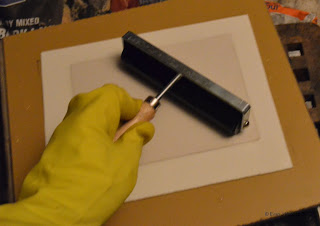 |
| Rolling the tissue and final support together. |
 |
| Draining the sandwich |
Stage 7. Developing the image
After leaving the sandwich of the tissue and support paper to rest for at least 15 minutes, the print can be developed in hot water. I usually use a bath of water that starts at about 45 degrees centigrade. The sandwich is slid into the water (with the tissue side up) and then left to float. Very soon, molten black goo starts to ooze from around the edges of the tissue as in the image below.
 |
| Oozing glop from the tissue edges. |
After a few minutes, a corner of the tissue backing is lifted and then the backing paper is pulled away in one smooth, heart stopping motion and placed to one side (not dumped in the bin yet). The stripped tissue should be black, with a very feint negative image visible where the shadow areas have pulled most of the gelatine from the support tissue. If there are areas which are nearly white, the tissue was exposed almost all the way through and it came very close to sticking the backing paper to the image and ruining it.
If the tissue support is still completely black, the image only used a fraction of the available pigment and so could be printed darker, or less soot is needed in the glop recipe next time.
The backing paper was not put in the bin as if there were any bubbles when the glop was poured to make the tissue, they will now show up as white dots in the image. The un-hardened goo on the backing paper can be used to touch up these areas after the print has been developed (when placed over a cup of hot water, the goo melts and makes a usable paint of exactly the right colour).
The print is now a black mass on the final support paper and can be flipped over and the paper floated, image downward in the tray of hot water. The image is then left to develop slowly with the superfluous pigment falling away to the bottom of the tray, rather than sitting on the paper and risking staining it.
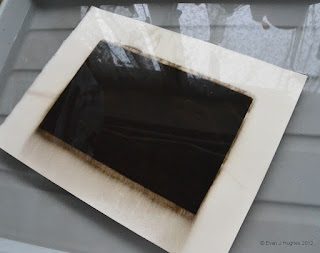 |
| Final support paper just after removing the tissue backing paper. |
Every 5 minutes or so, the paper can be flipped over and the state of the development checked. By holding one corner of the print, it can be 'jiggled' in the water to help disperse the dissolving pigment a little: beware however, it is very easy to overdevelop and lose the highlight detail through excessive 'jiggling'.
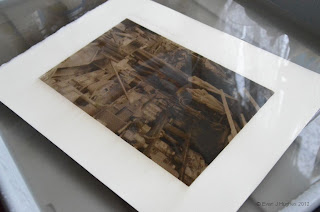 |
| Part developed print |
At the end of the development, the print can be taken out of the (now only warm) water bath and placed into a tray of cold water to allow the gelatine to set much firmer and therefore be more robust. A cloth can also be used to carefully tidy up the edges and remove any residual gelatine from the masked off area around the print (there should be a very feint grey border left otherwise it means that the highlights have over developed). The print can now be drained and placed on an old newspaper to dry.
If there are any white areas left by bubble areas of the tissue, or bubbles that occurred during the mating bath, they may be touched up working 'wet-in-wet' with some warmed up gelatine from the backing paper that was saved earlier. If the print looks good, bin the backing paper now.
The print can be left to partly dry on the newspaper, then hung up on a line to dry fully.
Stage 8. Final washing
Once the print is dry, it will be more stable and more robust than most printing techniques could ever dream of, however there is one final step that will help to make the image even more stable. During the development, there is a chance that not quite all of the dichromate was removed and if really strong solutions were used to sensitise the tissue, there may be a slight yellow stain left.
The solution is to resoak the print in the following solution:
30g Potassium Metabisulphite
30g Potassium Alum
1L water.
I leave it for a good half hour and then wash the paper in 5 changes of water, leaving it to soak for 5 minutes in each water bath. The print can now be dried one last time and enjoyed!
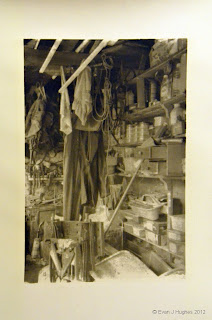 |
| Final print after drying. |
Postscript
I had a piece of one of my first soot prints in the study window for 2 years and 4 months with half of it covered (right hand side), and half exposed to sunlight (left hand side). The soot I used was not washed in any way and I had noticed that the tars and oils in the soot gave the paper a yellow stain. On exposure to the sunlight over the 2 years, the yellow stain had gone, but the soot had not faded whatsoever. I have photographed the test strip below.
 |
| Soot-based carbon transfer test sheet |
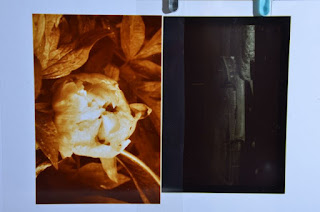 |
| Sun exposed ink-jet image on right, fresh print on left |
I had not realised just quite how light sensitive modern ink-jet prints are; I know that fading is tested based on 'how long the pigments take to fade to half their density' which always seems a bit of a con, but the degree of fading from not top-quality inks is startling.